Subscribe


 Anatomy of a cookie
I had a request for a "Minnie Mouse" cookie but I did not have a Minnie Mouse cookie cutter. I sat looking at all my cutters trying to think, how can I do this without buying another "one use" cookie cutter?
The obvious part was tyat the "mouse" would be two different sized circle cutters, 2-1/2 and 1-1/2 inches each. I settled on a 2-inch mini butterfly to use for the bow.


After they baked and were decorated, you could not tell it was a patchwork cookie!


Bring it on folks! Keep challenging me to create a cookie without buying another cutter! I loved the challenge!

Rent Party!


Click here to help or learn more!
Photo Cookies 101
Photo Cookies 101
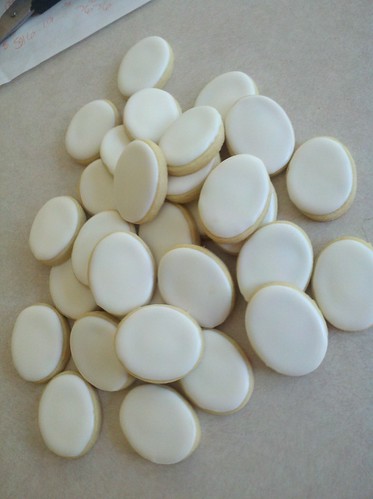
- If the edible paper (EP) got too wet it would rip or the edible image (EI) would smear.
- If I didn't wait long enough for the EI to dry they would stick to the cello bag when packaged and rip off the cookie, very frustrating!
- Or the opposite, not sticking to the cookie once it was dried.
Step 1
Step 2

Step 3


Step 4


Step 5


Ta Da!

Feedback

Photo Cookies
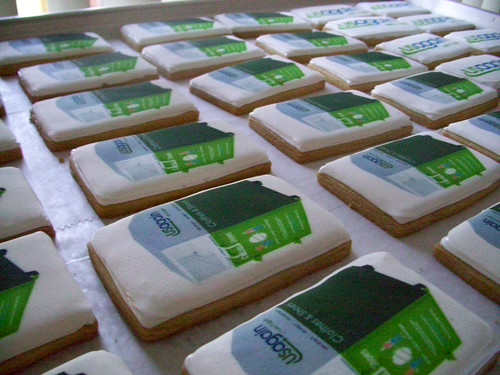
I get requests all the time for photo cookies. They are a great way to make a very big impact on the recipient. I struggled for a long time trying to find the right way to put the paper on the cookie without ruining it. Finally, after about 3 years, I got it right (yep, I can be a slow learner sometimes! LOL).
I want to share with you what I have learned to help you cut down your learning curve! So today I will be making some photo cookies and photo documenting the process so that I can post it here tomorrow. Watch for it!
Memorial Day 2012

I wanted to do cookies as a way to say Thank You to those who have served our Country in the Armed Forces. I found an Armed Forces Service Medal and used that as the inspiration for this set.
I really had fun making these!
What do you see?
2012-05-18_10-51-32_979, a photo by Sugar Beez on Flickr.
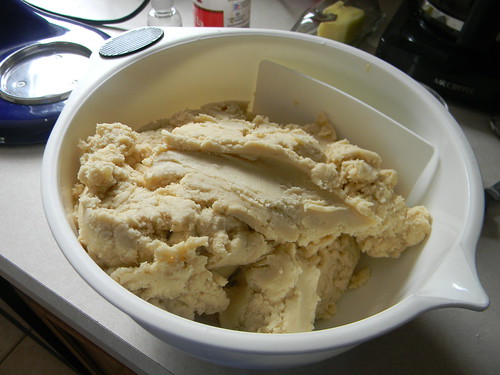
Why is cookie dough like a man?
It took me a lot of trial and error (and really bad cookies) before I learned how to make cookie dough well. I think this process is worth sharing. Now I'm not saying I'm any kind of expert, there are probably as many ways to make roll out cookie dough as there are recipes on the web. This is just the way I do, but I would love to see/hear from others on how they do theirs. I will post my recipe down at the bottom.
Step 1 - Butter
- 1 pound at room temperature
If I forget to take it out of the fridge and I don't have time to wait for it to come to room temperature I soften it in the microwave. Remove it from its wrapper, place it on a microwave safe dish, and heat it for 10 seconds. Then turn it on it's side, (I always rotate it in towards the center of the microwave so I don't keep microwaving the same sides over and over.) and microwave it again for 10 seconds, rotating each time. I usually use 1-pound blocks of butter so if you are using a quarter stick microwave for 5 seconds instead of 10.
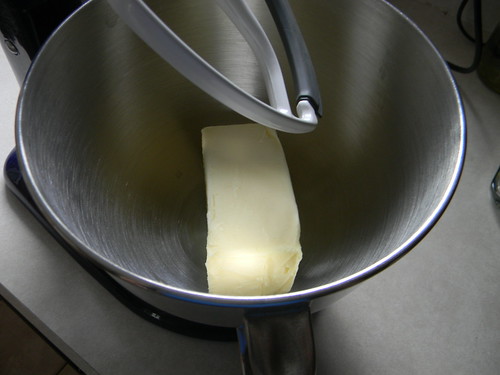
I usually beat it a little so that it is ready for the sugar.
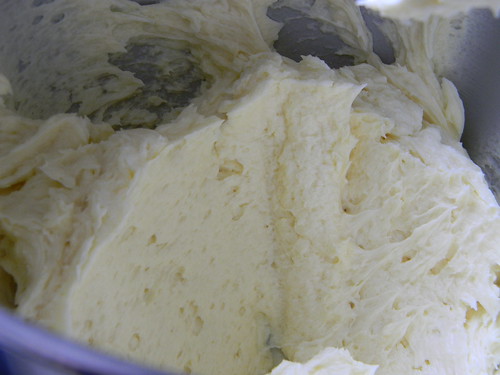
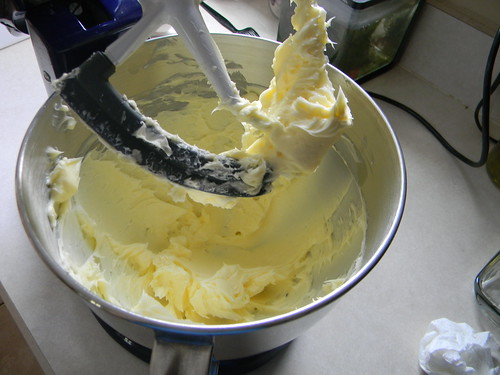 |
| This is what light and fluffy should look like. |
Step 2 - Sugar
- 2 cups powdered sugar
Add the sugar and beat until light and fluffy. Here is a trick I learned years ago, and I wish I could remember who to give the credit to, but alas my memory has failed me...sigh. I take a kitchen towel and wrap it over the mixer and bowl like so....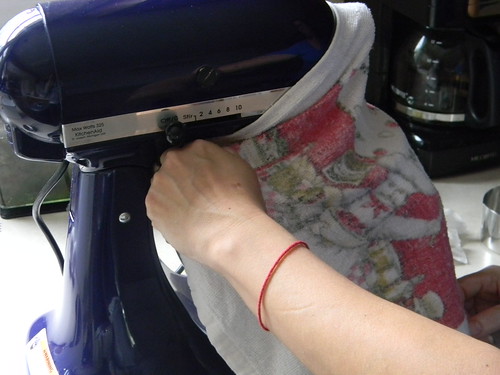
This will keep the sugar (or flour) from "poofing" all over the counter, the coffee maker, the mixer, the baker...
Step 3 - Flavor / Eggs
- 4 tsp any flavor
- 2 eggs at room temperature.
Add the flavor and eggs. And if you forgot to take the eggs out of the fridge too, no worries I have a link below with great instructions on how to bring them to room temperature quickly. These are the remainder of the "wet" ingredients...mix them until they are totally incorporated.
Not like this
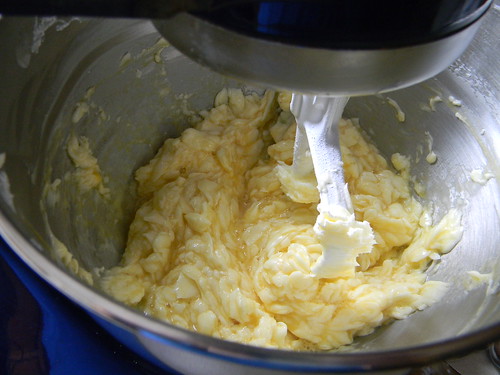 |
| The mixture should not look like scrambled eggs. |
But like this
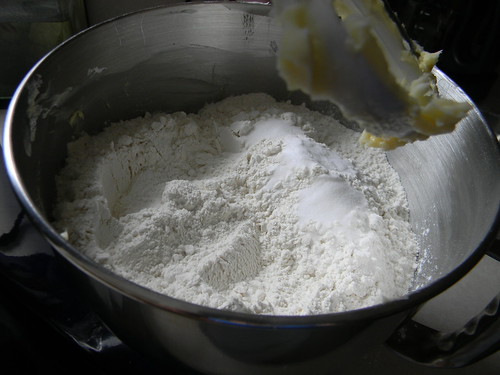
Make sure to scrape the sides and bottom of the bowl before adding the dry ingredients so that you don't end up with butter at the bottom of the bowl that didn't get integrated into the dough.
Step 4 - Dry Ingredients
- 5-1/2 cups flour.
- 2 tsp baking soda.
- 1/2 tsp salt.

Then scrape the dough into a bowl, or some folks flatten it into disks, do what ever works for you, and let it rest for at least 30 minutes. If I'm going to roll dough right away I let it rest on the counter covered. If I'm not going to roll cookies until the next day I let it rest in the fridge.
Step 5 - Baking Instructions
I hope you found this post helpful, I sure wish someone would have done something like this when I was first starting out.
Recipe
Helpful Links
Baby Buggy Cookie
I had a request for baby carriage cookies. I have done some in the past, you can see them on my website. I wanted to do something different and I came across a baby carriage on a site and I used it as my inspiration for this cookie.
I added the ruffles with a 101 tip (boy, my hand hurts from squeezing that extra stiff icing). I learned to put less in the piping bag so I didn't have to squeeze so hard.
Also, a trick I used starting with these cookies that I learned from Lisa The Bearfoot Baker is o use a fondant smoother (click here) to smooth the cookies flat when they came out of the oven. This gave them a very flat surface to lay my base icing down and really helped to add a professional look to the finished cookie.

Thanks for letting me share!
Spring Bouquet
I have set some goals for the business...1. I will make $1000 in sale in April, then today I got an order for $770...wow...big jump on the $1000 goal!
2. I will post photos at least 3 times a week of cookies. So, here is the one I did today.
Spring flowers are popping up in my yard...love the burst of color and the wonderful scent of flowers in the air.
I used a seashell cookie cutter as the base for this cookie. My goal also is to grow my creative side by trying to see multiple uses for each cookie cutter. I like the way Alton Brown thinks about kitchen tools/gadgets, they should all be multi-taskers...well my cookie cutters should be too, right?

My Weakness
This imperfection in my persona causes me much grief.
- I have times when someone will ask me to do a custom cookie design and I think about the best way to do the design, but have trouble shifting from the thought process to the "doing" processes.
- I want to lose weight, and have a great treadmill in the basement, and I will think about going down and getting on to run a mile, but then I begin to think about what I have to get done to complete the goal...shower,
Snowy day!
We have been talking (okay, somewhat complaining) about the very mild winter here in Illinois.
Today I need to go hit Sam's Club to stock up on flour, sugar, butter, all the cookie necessities, and this is what it looks like outside.
Going to Sam's with my 2-year-old grandson in tow is going to be an adventure! I need a shower already just from shoveling my driveway to get to my car!


Dream Job
I started my cookie business with the goal of it becoming my Dream Job, one day being able to give up my regular job of medical transcription to work my own custom cookie business. I follow Marie Forelo
 and through her emails I learned about Ramit Sethi and his Dream Job system.
  I signed up for it, thinking I would find a way to grow my cookie business into the vision of a Dream Job I had in my mind. LOL...too funny looking back now. After 3 weeks in the Dream Job program I realized I was not the target market Ramit was looking for when he designed the program. He was looking to help those in high level positions to earn more money and position themselves to advance their careers. And while I do want to increase my earning potential, I do not have a high level position, nor do I feel that a high level position at any medical transcription company would be my dream job.
 Through the research Ramit has you do in the Dream Job program, I realized that I already have my Dream Job, the cookie business, and after researching what bakers earn, and small business bakery owners I realized that I'm not going to make a substantially large amount of money as a cookie decorator. The research I did showed most bakers make between $8 and $14 (with 20 years' experience) working for large bakeries or grocery store chains, that independent bakery owners actually make less because of the amount of hours they put in to keep their businesses going.
That information actually knocked me back on my seat. I literally felt depressed for about a day. Then I thought about it, this is my Dream Job, no one ever said your dream job would make your rich, just that it would make you happy. And it does make me happy to decorate cookies and be at home with my daughters. I also make pretty decent money as a medical transcriptionist, between $15 and $22 an hour when I focus like I should. I realized I have nothing to be depressed about, and I actually found myself happier than before I entered that Dream Job program.
Motivation
I follow Marie Forleo and watch her Q&A Tuesday videos religiously. Today's video was about motivation.
What I know about motivation is nothing...do nothing, nothing happens. Then it dawned on me...I was doing nothing. I was not blogging at all because I could not find my motivation. Marie says to take action, so that it EXACTLY what I'm doing, taking action.
There is no reason that I have to wait for some big idea to hit me to blog, the little ideas will lead to the bigger ideas. I just have to take some action.


I had made them as samples to share at Girls Lunch Out on Saturday, but then I had to cancel, so they are free to new followers if our blog. Email me to let me know you are following, don't forget to provide and address, and 6 cookies will be yours!
Tracy@sugarbeez.com
Ready...Set....RE-go!
I'm a divorced mother to 5 daughters (yep, 5), 3 grand babies and trying to keep all my spinning plates in the air.

